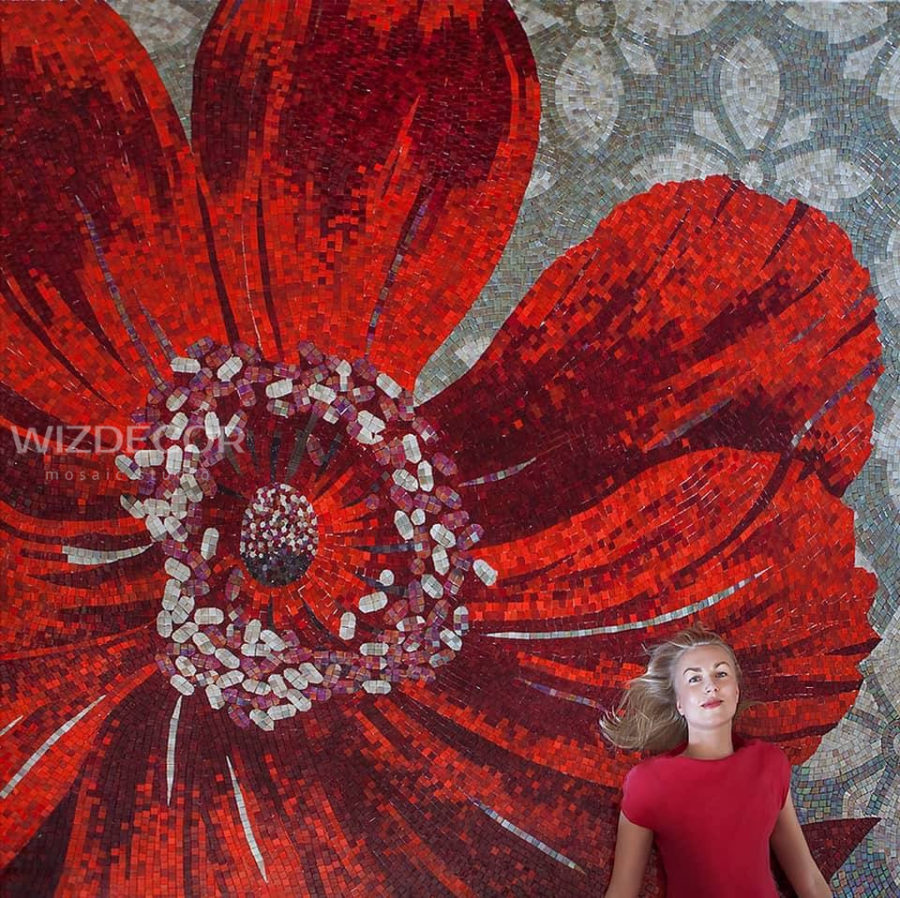


Laying a mosaic (panel – “Red Poppy”), the creation process, photos and cost.
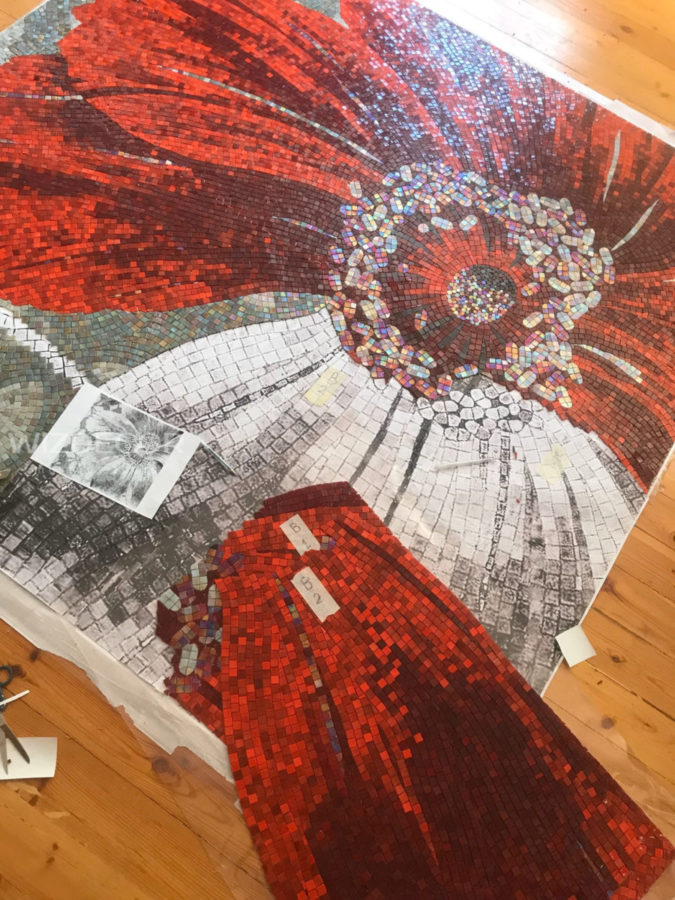
The sketch of the panel and the visualization of the interior were made by the designer and approved with the customer.
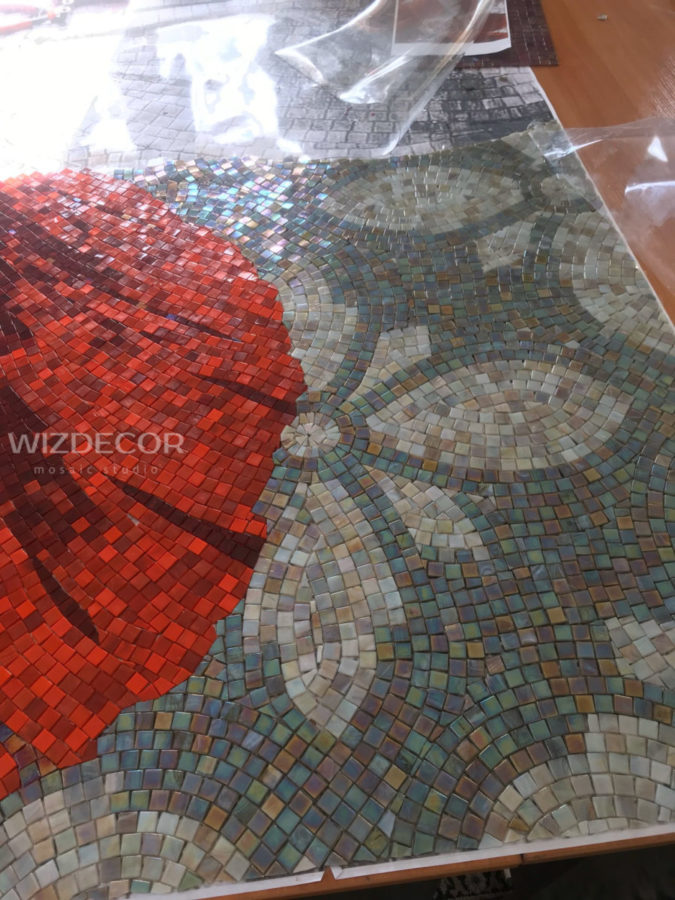
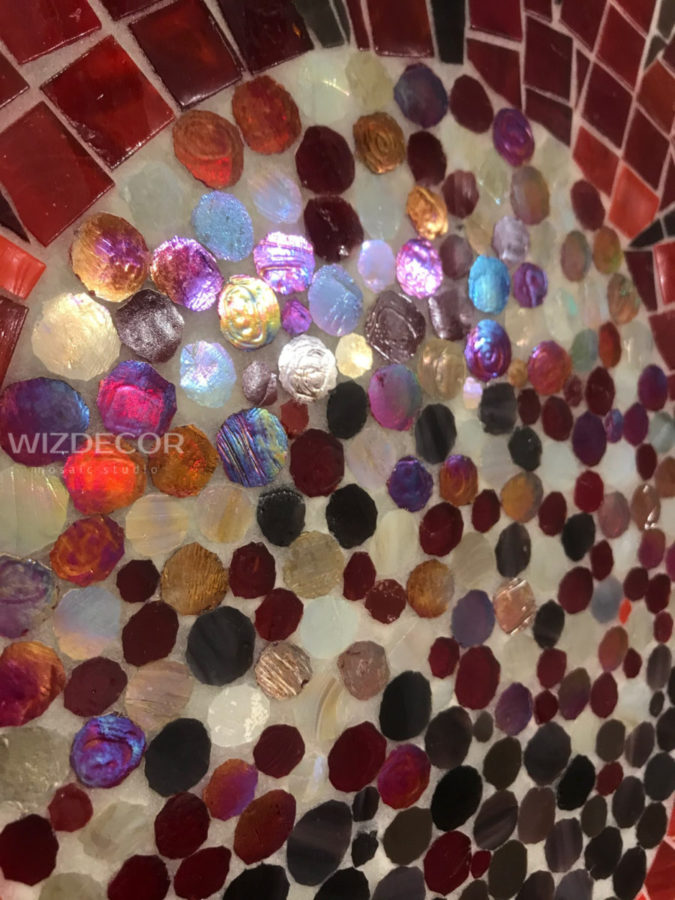
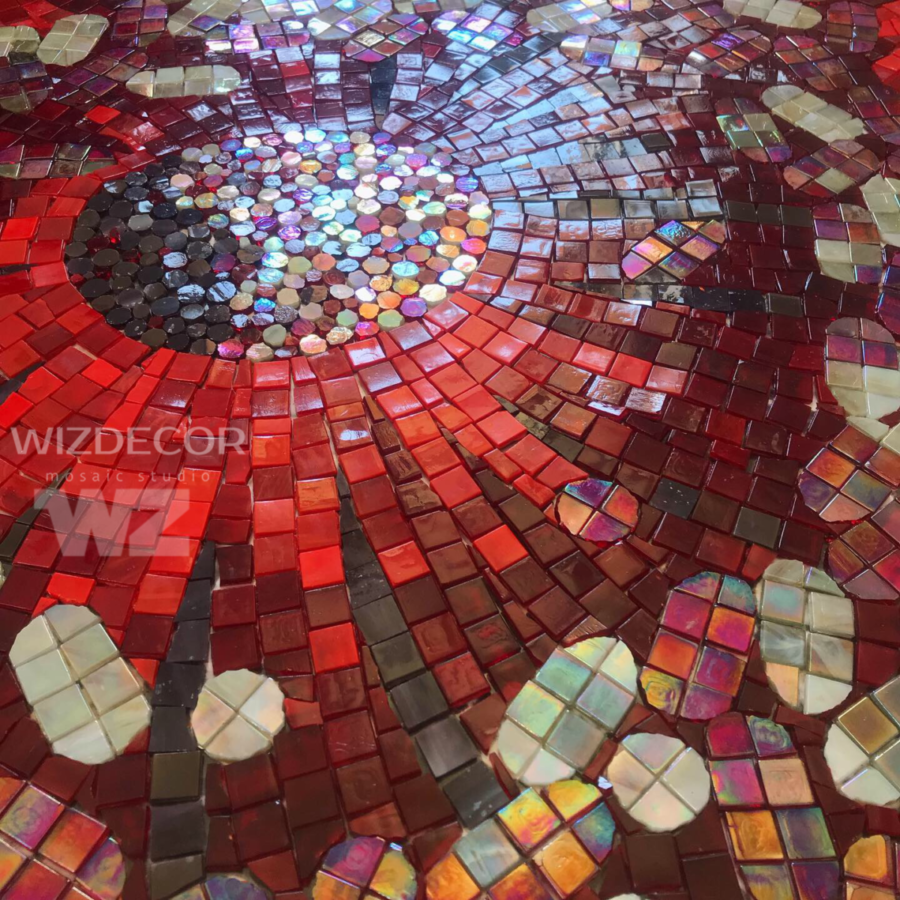
After that, the sketch was printed in full size. We selected the material from the ROSE palette, module 1.5 x 1.5 cm. Each glass tile has its own shade and slightly uneven surface, which creates a unique play of shades and radiance.
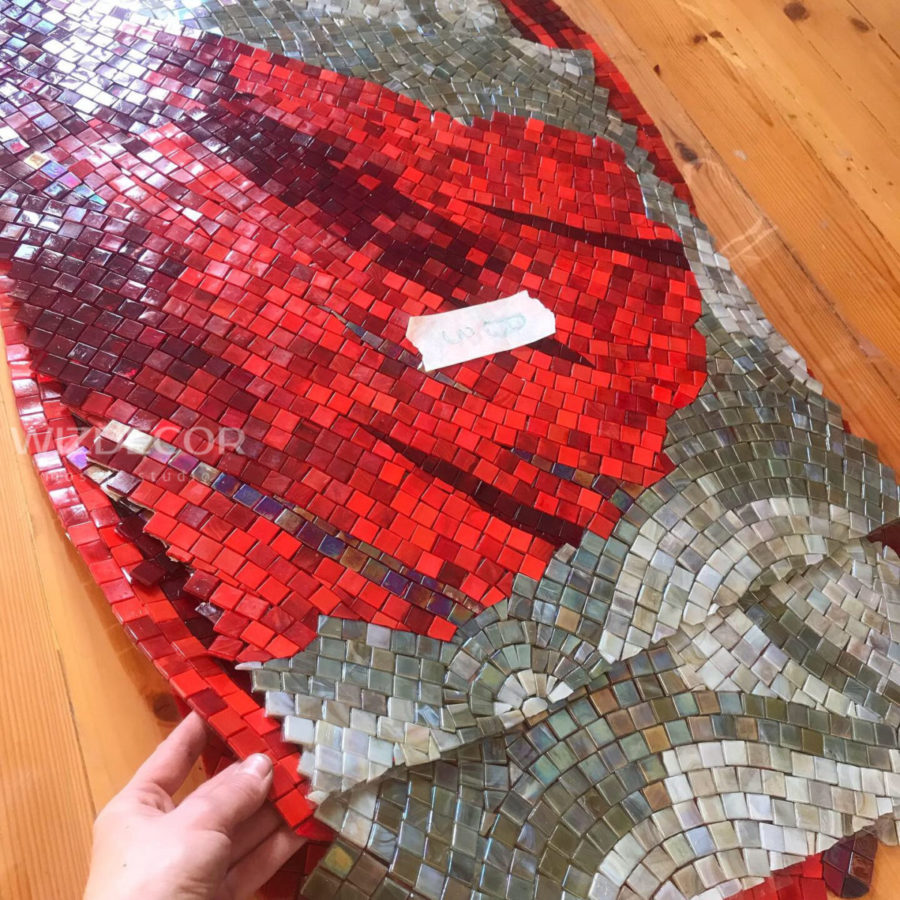
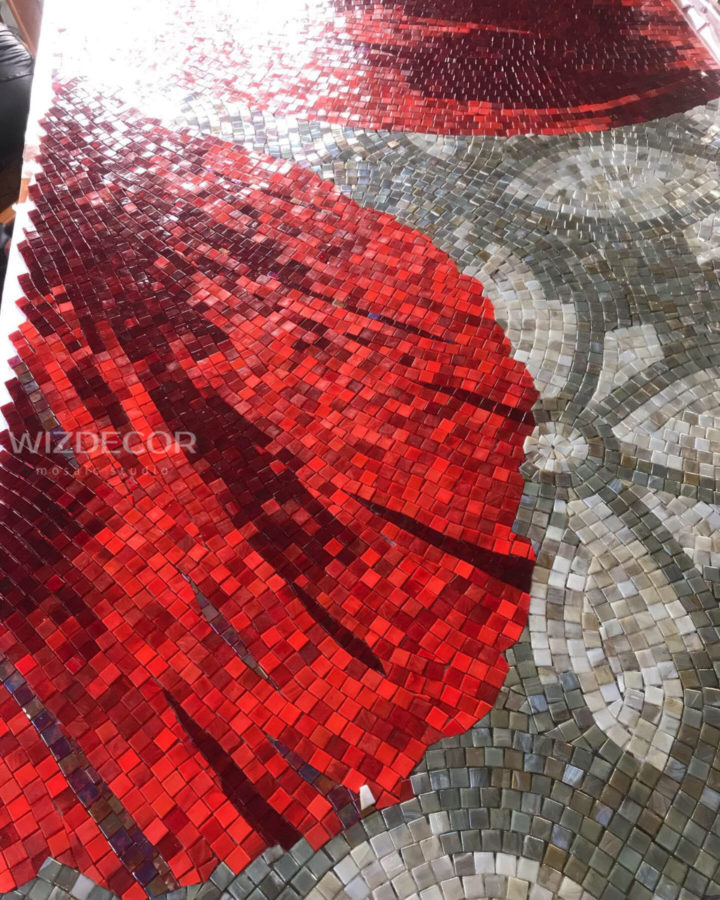
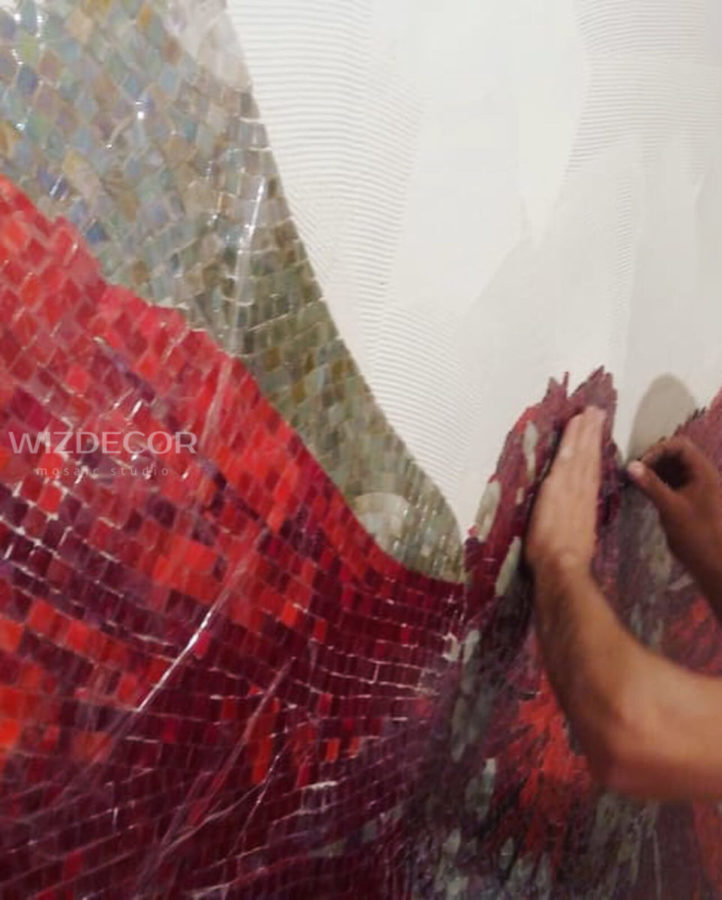
The panels were assembled in the workshop of our studio for two weeks. The assembly was performed by reverse dialing (face down) on the Oracal film laid on top of the sketch. An important point: if the panels are assembled face down, then we print the sketch in a mirror image.
After assembly, the panel is cut into pieces approximately 50×50 – 70×70 cm for transportation to the facility.
The mosaic area is 4 m2. The surface is leveled and prepared before laying the mosaic.
The cost of laying mosaics in the bathroom, the panel is ``Red Poppy``.
The table shows the laying of mosaics on the wall, including all materials and works.
| № п/п | Name of works and materials | The cost per panel in its entirety, including all materials, RUB/m2 |
|---|---|---|
| 1 | The work of a mosaic master | 8500 |
| 2 | The cost of all materials for laying the panels | 1000 |
| 3 | Total (RUB): | 9500 |
The process of laying the mosaic
Mosaic laying in the bathroom is carried out with Lotoelastic epoxy adhesive, consumption is approximately 1 kg per 1 m2. Carefully apply the glue, leaving no excess and glue the mosaic piece by piece, starting from the bottom of the bathroom. It is important to pay a lot of attention to the seams between the mosaic fragments so that there are no poorly glued tiles, and also not to apply too much glue at once, since its adhesive ability on the wall remains open for 40-50 minutes, no more.
If the glue has come out of the seams in places, it’s not scary, it can be cleaned when it dries.
We leave the mosaic for at least 2 days – the epoxy glue hardens quickly.
The next stage of laying the mosaic on the wall is the final one. Carefully remove the Oracal film from above. We clean the seams where the glue came out with a knife. If some tiles are glued incorrectly, they can be removed and re-glued one at a time.
The seams in the mosaic bathroom are rubbed with epoxy grout with the “chameleon” effect of Litokol “Starlike Crystal”. This grout is almost transparent, but it gives the seams a shade of the surrounding mosaic tiles, and the seams become almost invisible.
Very carefully we wash off the remnants of the grout from the surface – and now we have completed the laying of the mosaic!